【指南】如何安装和使用CLIP
我们将介绍如何在你的系统上启动和运行 CLIP。将指导你如何安装 CLIP、运行演示,并通过基本代码示例执行推理。

步骤 1:安装 CLIP
在开始使用 CLIP 之前,你需要对其进行正确设置。幸运的是,无论你是想通过 GitHub 还是Hugging Face Transformers使用它,安装过程都很简单。
GitHub 安装
1. 克隆 CLIP 仓库:
- 打开终端并运行
git clone https://github.com/openai/CLIP.git cd CLIPclone https://github.com/openai/CLIP.git cd CLIP
2. 安装依赖包:
- 进入版本库后,使用 pip 安装必要的 Python 软件包:
pip install -r requirements.txt
3. 测试安装:
- 运行以下命令可检查安装是否成功:
python -c "import clip; print('CLIP is installed!')"clip; print('CLIP is installed!')"- 如果一切顺利,你会看到一条确认安装的信息。
Hugging Face 安装
如果你更喜欢通过 Hugging Face 的 Transformers 库使用 CLIP,下面是操作方法:
1. 安装变形程序库:
- 运行以下命令:
pip install transformers
2. 安装 PyTorch:
- 如果没有安装 PyTorch,则需要先安装。请访问 PyTorch 网站,获取适合你系统的正确命令。
3. 从 Transformers 中导入 CLIP:
- 一切安装完毕后,你可以使用以下命令轻松加载 CLIP:
from transformers import CLIPProcessor, CLIPModel
步骤 2:运行演示
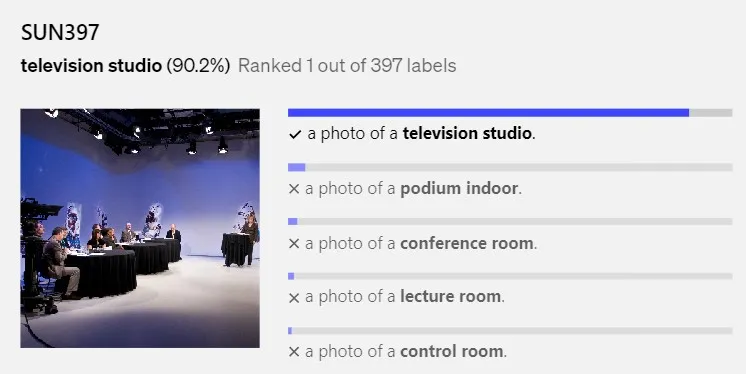
现在你已经安装了 CLIP,是时候运行一个基本演示来了解它的运行情况了。在演示中,你可以输入一张图片和一组文字说明,CLIP 会告诉你哪段文字与图片最匹配。下面是操作方法。
使用预训练模型(来自 GitHub)
1. 下载模型: CLIP 随附了多个预训练模型,但在本例中我们还是使用流行的 ViT-B/32 模型:
import clip
import torch
from PIL import Image
model, preprocess = clip.load("ViT-B/32", device="cpu")
2. 准备图像和文字: 你可以载入任何图像,并为 CLIP 提供一系列文字说明:
image = preprocess(Image.open("path_to_your_image.jpg")).unsqueeze(0)open("path_to_your_image.jpg")).unsqueeze(0)
texts = clip.tokenize(["a dog", "a cat", "a car"])
with torch.no_grad():
    image_features = model.encode_image(image)
    text_features = model.encode_text(texts)
# Compare which text matches the image
logits_per_image, logits_per_text = model(image, texts)
probs = logits_per_image.softmax(dim=-1).cpu().numpy()
print("Label probs:", probs)
3. 检查结果: CLIP 将为每个文本描述输出概率。最高概率表示图像的最佳匹配度。
步骤 3:执行推理
设置好演示后,使用 CLIP 进行推理就很简单了。你可以使用 CLIP 处理新图像和文本,从而构建强大的应用程序,如图像搜索引擎或标题生成器。
示例:图像搜索
下面是一个使用 CLIP 进行图像搜索的示例。想象一下,你有一组图像,并希望找到与特定文本查询最匹配的图像。
1. 加载多张图片:
- 你可以加载多张图片,然后运行 CLIP 查找与给定文本最匹配的图片:
images = [preprocess(Image.open(f"image_{i}.jpg")).unsqueeze(0) for i in range(5)]open(f"image_{i}.jpg")).unsqueeze(0) for i in range(5)]
images = torch.cat(images, dim=0)
text = clip.tokenize(["a photo of a cat"]).to(device)
with torch.no_grad():
    image_features = model.encode_image(images)
    text_features = model.encode_text(text)
# Calculate similarity
similarities = (image_features @ text_features.T).squeeze()
best_match_idx = similarities.argmax().item()
print(f"Best matching image is image_{best_match_idx}.jpg")
2. 输出:
- 上面的代码会告诉你哪张图片最符合给定的文本查询。这在内容管理或可视化搜索引擎等应用中非常有用。

步骤 4:使用 CLIP 和 Hugging Face
对于那些喜欢 Hugging Face 的 Transformers 库的人,可以使用稍有不同的方法来运行推理。
1. 加载模型:
from transformers import CLIPProcessor, CLIPModel
from PIL import Image
model = CLIPModel.from_pretrained("openai/clip-vit-base-patch32")
processor = CLIPProcessor.from_pretrained("openai/clip-vit-base-patch32")
2. 推理:现在可以用类似于 GitHub 安装的方式运行推理:
image = Image.open("path_to_image.jpg")open("path_to_image.jpg")
inputs = processor(text=["a cat", "a dog"], images=image, return_tensors="pt", padding=True)
outputs = model(**inputs)
logits_per_image = outputs.logits_per_image
probs = logits_per_image.softmax(dim=1)
print("Label probabilities:", probs)
总结
在本文中,我们介绍了如何使用 CLIP 进行图像和文本匹配的技术设置、安装和演示。


